Get started with CageSense®


Everything you need to know to get started using CageSense.

​What you need 


1 x CageSense Topside

2x CageSense Receiver cables

One or more CageSense sensors

1 x CageSense sensor charging pad

1 x Ethernet cable

Computer with internet connection

How to get started


1. Connect to the internet

Connect one end of the supplied Ethernet cable to the Topside and the other to an internet port.
CageSense automatically checks for connection to the internet. 


Select your Gateway from the list displayed to check its status. Once connected, tap Next.

Not seeing the Topside in the list? Your internet may be behind a firewall. For tips on how to fix it, read more here. 

2. Select location

Use the map to select and place where your facility is located. If your facility is already marked on the map by us, you don't need to do anything.  


When the facility is highlighted on the map, press Next.


3. Connect receiver cables

Attach two or more receiver cables to the Topside inputs. CageSense automatically checks that they're connected. Once at least two cables are connected, proceed to the next step.


4. Add sensors

Place a sensor on a charging pad connected to power. Wait for the LED on the sensor (at the very bottom) to start pulsing green which means it is in search mode. When it appears in the sensor list, select "Add" and give it a name that tells what type it is and where it is located. An example would be "Cage 1 - Oxygen - Depth 10 meters".


If you have multiple sensors, repeat this step. When you are done, press Next.

Congratulations, the setup is complete!


Great! You've now set up the basics needed for CageSense. You are now ready to place sensors and receiver cables in the water. Carry on reading for our recommendations for placing the units.


You have now completed all the necessary steps, but we recommend that you also read our advice below to ensure that your equipment lasts a long time.

A few things to keep in mind​


To prevent the receiver cables from flapping around in the water, we strongly recommend attaching a weight to each one. It's also a good idea to have strain reliefs on the cables in case of strong jerks. This will reduce the risk of damage to the Gateway's ports.

When the receiver cables are to be placed in the water (with the receiver head down in the water), they should be placed well below the surface of the water (1-2 meters) and in a place where there is little obstruction between them and where the sensors should be. Choose a location where they are safely located from moving parts such as machines, outlets and boat traffic. Attach the cable to shore with e.g. strips or wire.

Finally, place the sensors in the water at the locations you selected during sensor setup. Once that's done, you can follow the readings on cagesense.cloud.


Help and troubleshooting


Nettstedet kan bruke cookies for å tilpasse og legge til rette for best mulig navigasjon for brukeren. Brukeren kan konfigurere sin nettleser til å gi beskjed og avvise installasjonen av cookies sendt av oss.

Nettstedet kan bruke cookies for å tilpasse og legge til rette for best mulig navigasjon for brukeren. Brukeren kan konfigurere sin nettleser til å gi beskjed og avvise installasjonen av cookies sendt av oss.

Nettstedet kan bruke cookies for å tilpasse og legge til rette for best mulig navigasjon for brukeren. Brukeren kan konfigurere sin nettleser til å gi beskjed og avvise installasjonen av cookies sendt av oss.

Nettstedet kan bruke cookies for å tilpasse og legge til rette for best mulig navigasjon for brukeren. Brukeren kan konfigurere sin nettleser til å gi beskjed og avvise installasjonen av cookies sendt av oss.

Nettstedet kan bruke cookies for å tilpasse og legge til rette for best mulig navigasjon for brukeren. Brukeren kan konfigurere sin nettleser til å gi beskjed og avvise installasjonen av cookies sendt av oss.

CageSense does not connect with Topside

In order to set up the system, your Topside needs to "speak internet". If your facility or company has local network firewalls, you need to make sure that network traffic can pass through to cagesense.cloud. If you have a network administrator at your site, they can probably help.

Still no internet connection? Contact us at support@waterlinked.com and we will help you.

When will I see data transmitted by the sensors?

Data is transmitted from the sensors relatively quickly once they are in the water. However, the frequency may vary depending on how the sensors are configured for you. In the worst case, it can take a few hours.​


If you still don't see data from the sensors, contact us at  support@waterlinked.com  and we will help you.

How do I add more sensors later?
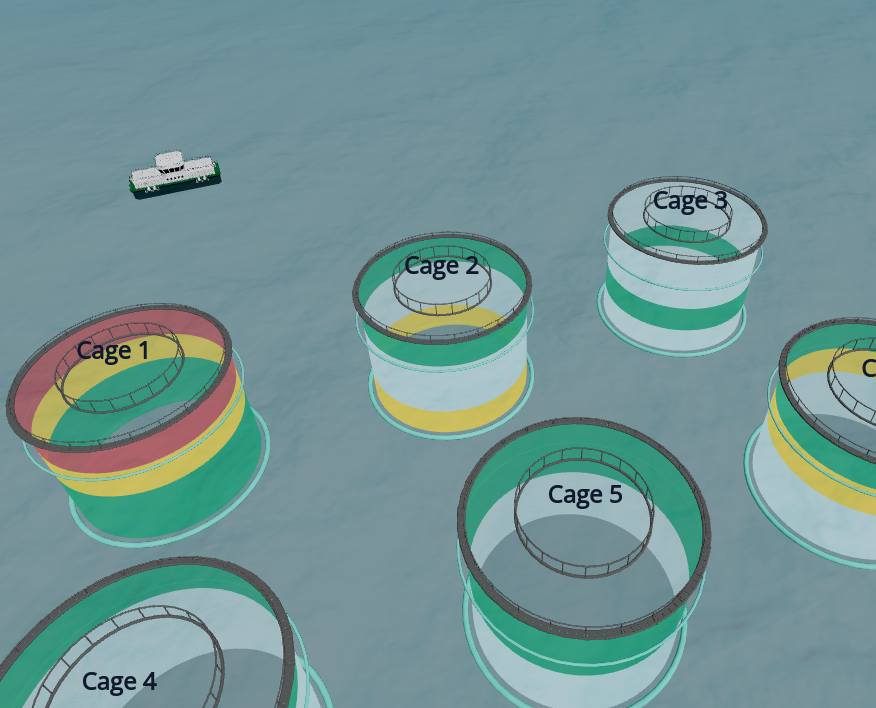

1.Select cage
Logg inn på CageSense ( cagesense.cloud ) and select "My site" from the menu on the left-hand side.


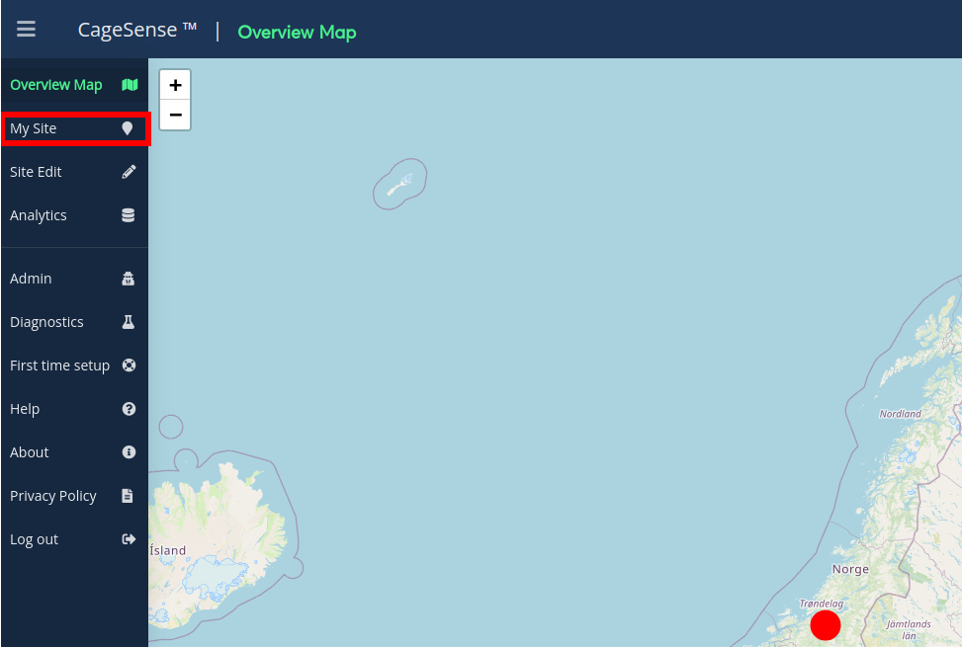
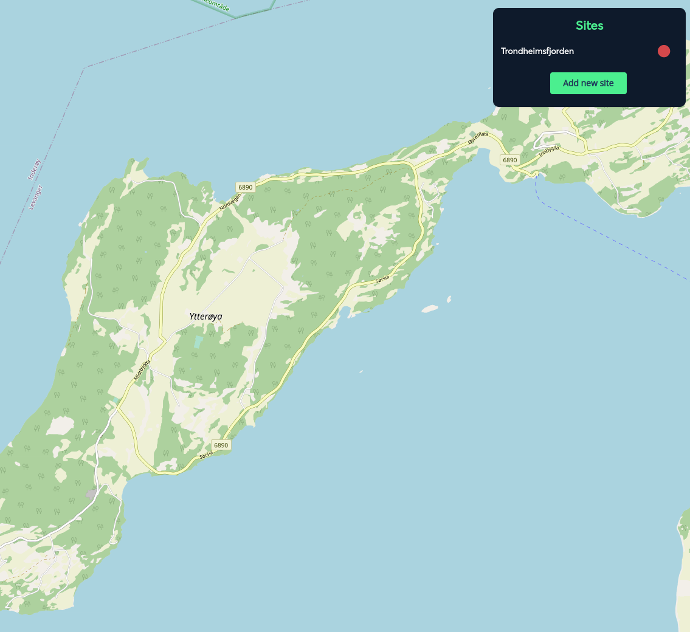
When your facility is displayed, tap the one to which you want to connect sensors.
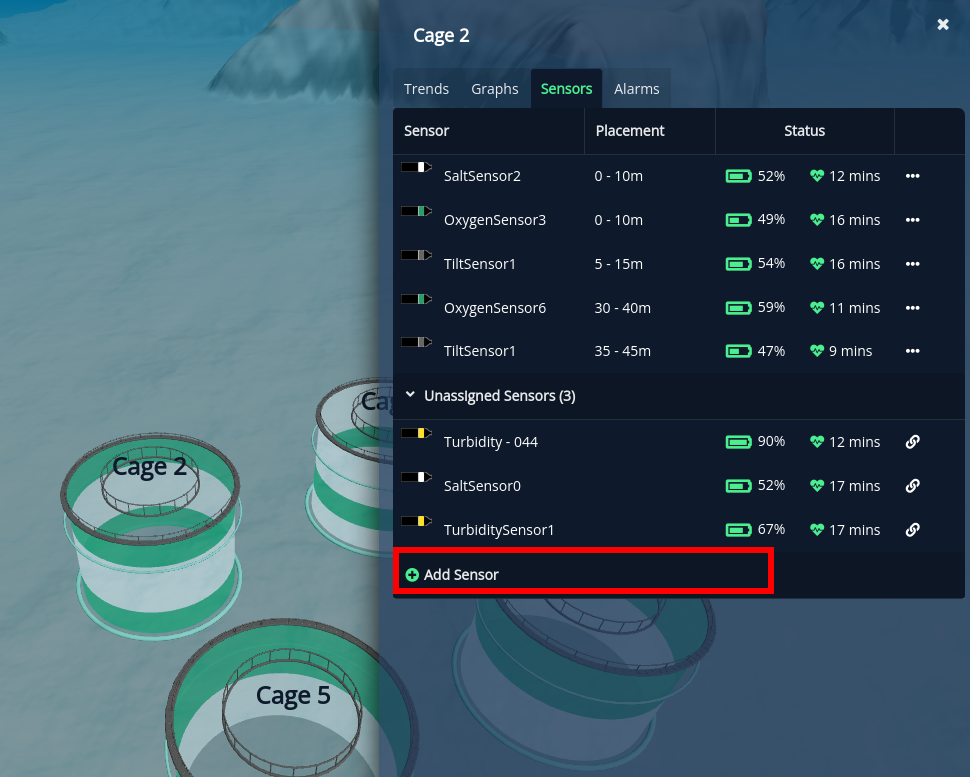


2.Add sensor
In the overview that appears, select "Sensors" and then "Add sensor" at the very bottom of the list.


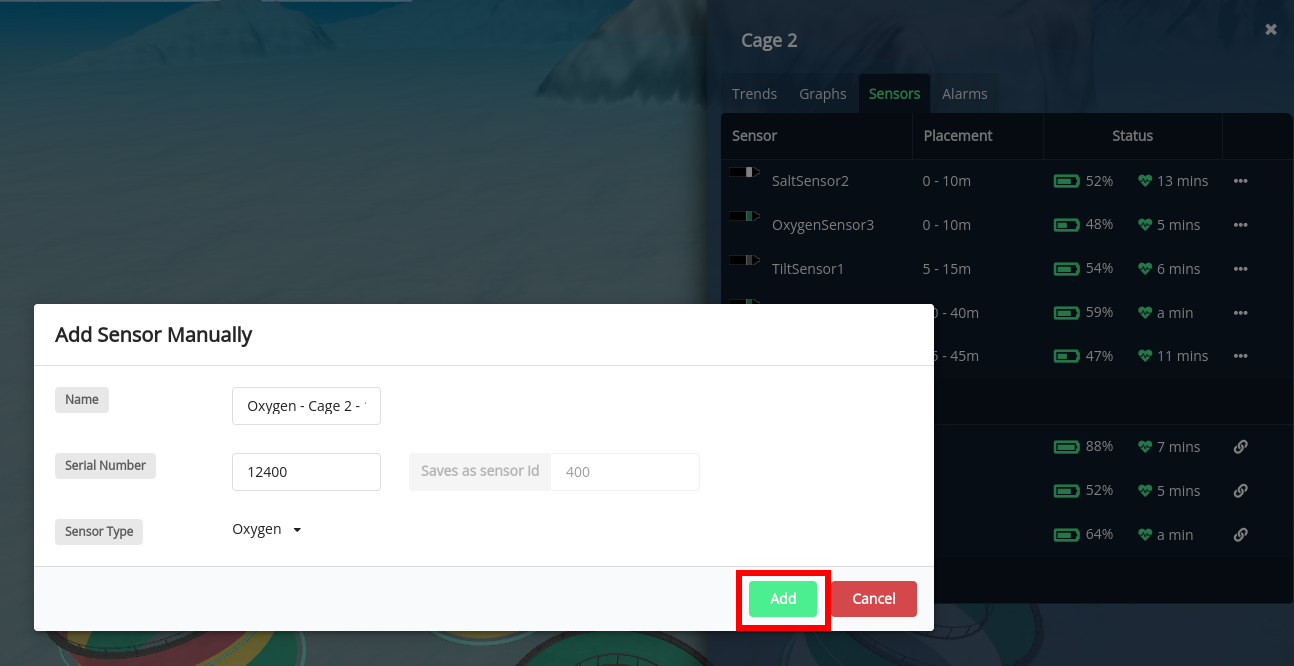
3. Enter the details
In the prompt that appears, enter the name of your sensor, the serial number, and select the type of sensor it is. Once done, press "Add".


4. Assign the sensor to a cage

In the list of "Unassigned Sensors" you will see the sensor you just added. Select the link icon at the far right of the sensor you added.


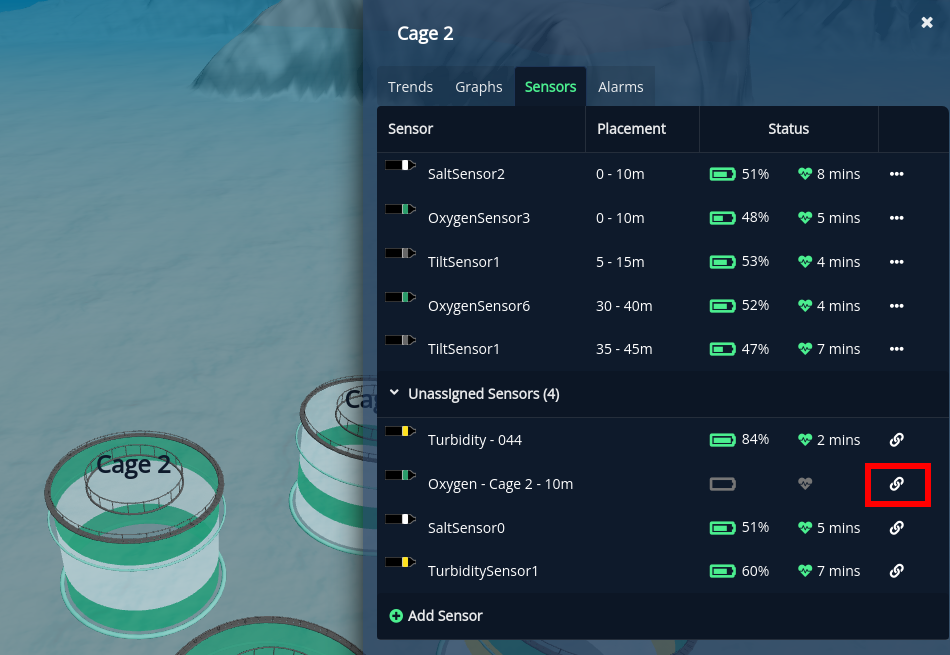
In the prompt that appears, select where in the cage you want it to be placed and press "Connect".


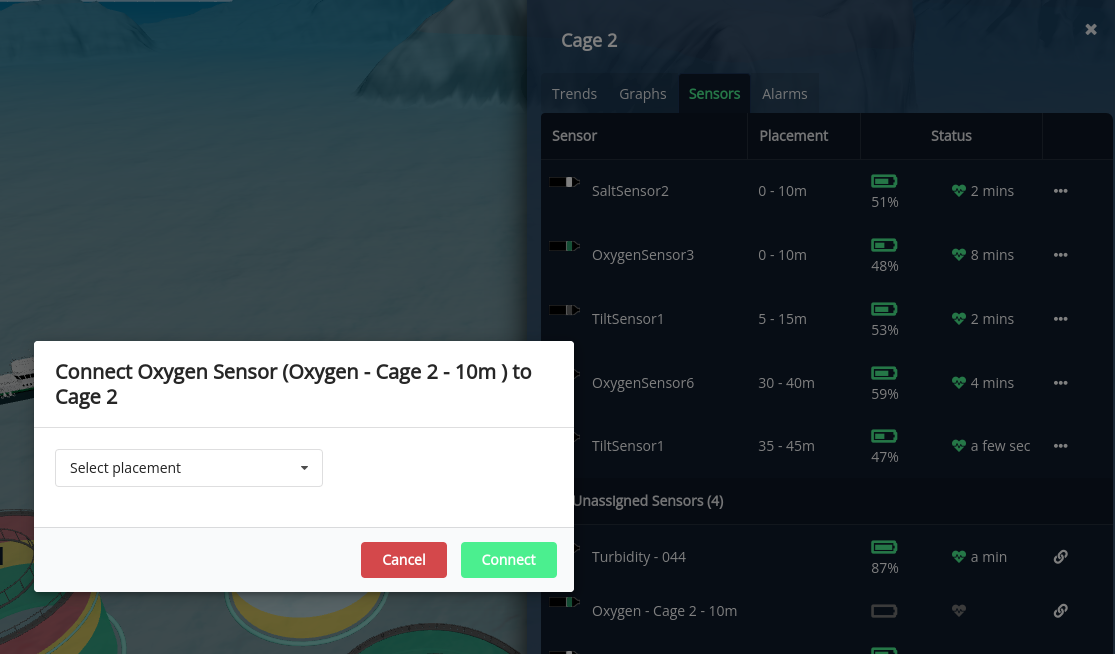
That's it! The sensor will now appear in the list of connected sensors and is ready to use!

What kind of weight should I use on the receiver cables?

You can use any weight that weighs 1 kg or more and can be secured to the cable. Due to their secure and good fit, we recommend using zinc anodes fitted a short distance from the receiver head at the end of the cable.


Didn't find what you were looking for?


Contact us – we will help you!

Popup Image